While there are many email providers available, Gmail stands out for its user-friendly interface, powerful features, and integration with other Google services. Getting the best of Gmail’s interface with the perks of having a personalised domain can be costly, but it doesn’t have to be.
If you own a custom domain and want to use Gmail for your email, these steps will guide you through the process of setting up Gmail for your custom email account (without purchasing Google Workspace).
1. Get POP3 and SMTP Details Ready
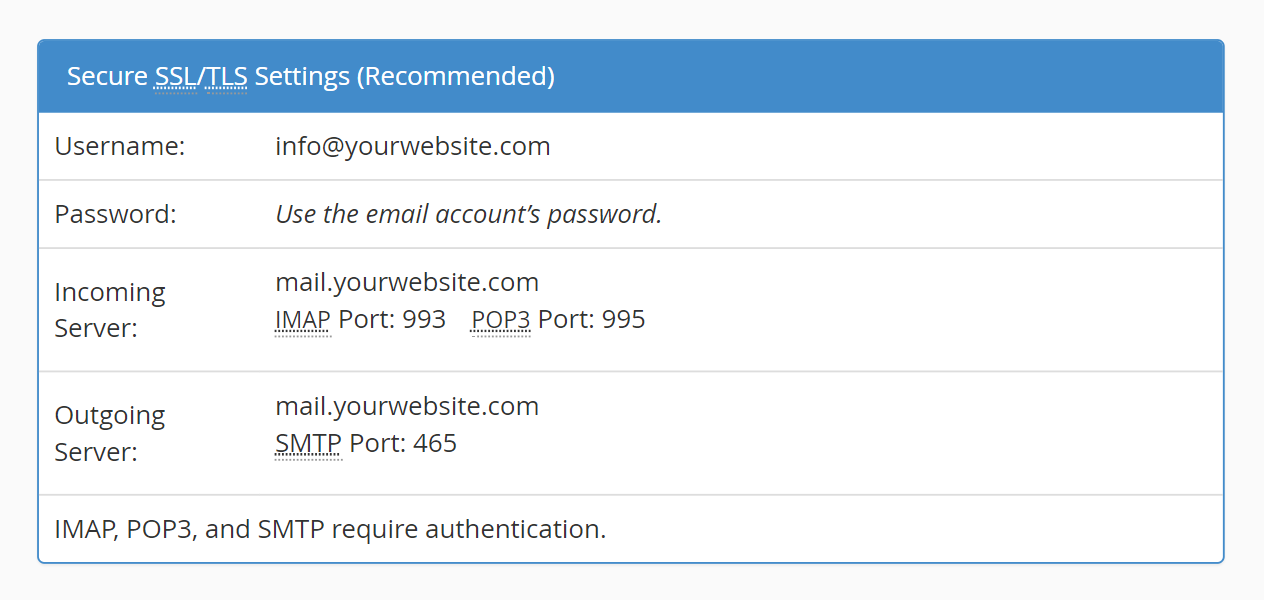
After creating your email account, you need to collect its POP3 and SMTP details. To locate your email configuration settings in your client portal, do the following:
- Go to cPanel
- Go to Email Accounts
- Click on Connect Devices of your email account
2. Forward Emails to Gmail Account
Now that we have the necessary data, it’s time to set up the Gmail account so it can receive messages sent to your email account:
- Login to your Gmail account, click on the gear icon and select Settings.
- Navigate to the Accounts and Import
- Under the Check mail from other accounts section, click Add a mail account.
- After you have entered your email, click Next.
- Select the Import emails from my other account (POP3), then click Next.
- Fill in the details using your email configuration settings. In our example, the username is info@yourwebsite.com, POP3 server is yourwebsite.com, and the POP3 port is 995.
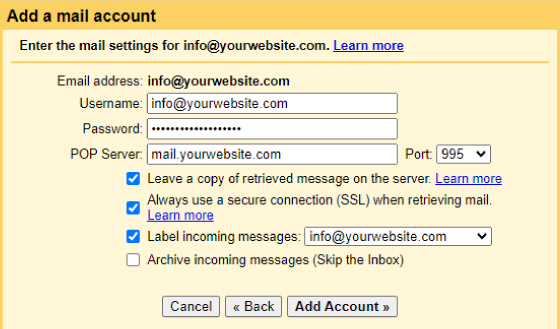
- You may then check the boxes as you need (we recommend ticking the first three boxes).
- Click Add Account.
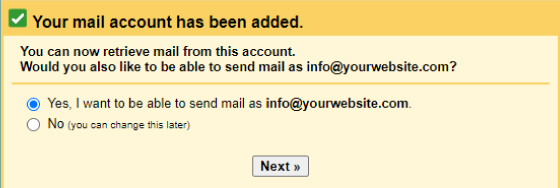
- Now you’ll be asked whether you want to send emails from your custom email address. If you only need Gmail to receive emails then choose No. But if you want to receive and send messages with Gmail, then select Yes and continue to the next step.
Configure Gmail to Send Emails with a Custom Domain
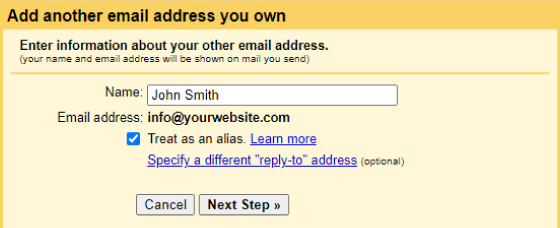
- Enter your name and email address, leave the Treat as an alias box checked, then click Next.
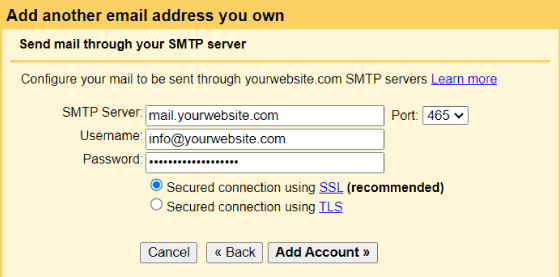
- Fill in the details using your email configuration settings. In our example, the SMTP server is yourwebsite.com and the SMTP port is 465.
- Select Secured connection, using SSL, then click Add Account.
- Go to your inbox and open the verification email. Use the link or code to confirm your request.
- Once you’re done, you can now use Gmail to send messages as your custom email address.
Using Gmail for your custom email account is a smart choice for individuals and businesses alike. It combines the familiarity and power of Gmail with the professionalism of a custom domain. By following the steps outlined in this tutorial, you can seamlessly set up and use Gmail with your custom domain, enhancing your email communication and branding.